| 일 | 월 | 화 | 수 | 목 | 금 | 토 |
|---|---|---|---|---|---|---|
| 1 | 2 | 3 | 4 | 5 | 6 | 7 |
| 8 | 9 | 10 | 11 | 12 | 13 | 14 |
| 15 | 16 | 17 | 18 | 19 | 20 | 21 |
| 22 | 23 | 24 | 25 | 26 | 27 | 28 |
- REACT
- 상속
- frontend
- JavaScript
- 자바스트립트
- 타입스크립트
- 프론트엔드
- typeScript
- 패스트캠퍼스
- Zustand
- webdevelopment
- 캡슐화
- 투두앱만들기
- Fetch
- 웹개발
- 리액트
- 추상화
- Hooks
- 클래스
- 부트캠프
- js
- 노마드코더
- Props
- 불변성
- 객체지향프로그래밍
- OOP
- 논리연산자
- CSS
- 자바스크립트
- github
- Today
- Total
connecting dots
React 1회차 (7/2) | 리액트를 사용하게 된 이유, 리액트 문법의 특징, 컴포넌트, Typescript 기초, Typescript 유형 본문
React 1회차 (7/2) | 리액트를 사용하게 된 이유, 리액트 문법의 특징, 컴포넌트, Typescript 기초, Typescript 유형
dearsuhyun 2024. 7. 18. 11:16type FooterProps = {
message: string
color?: 'blue' | 'red' | 'green' | 'yellow" // 또는
}
type HeaderProps = {
title: string
size?: 'small' | 'medium' | 'large'
color?:'blue' | 'red' | 'green' | 'yellow"
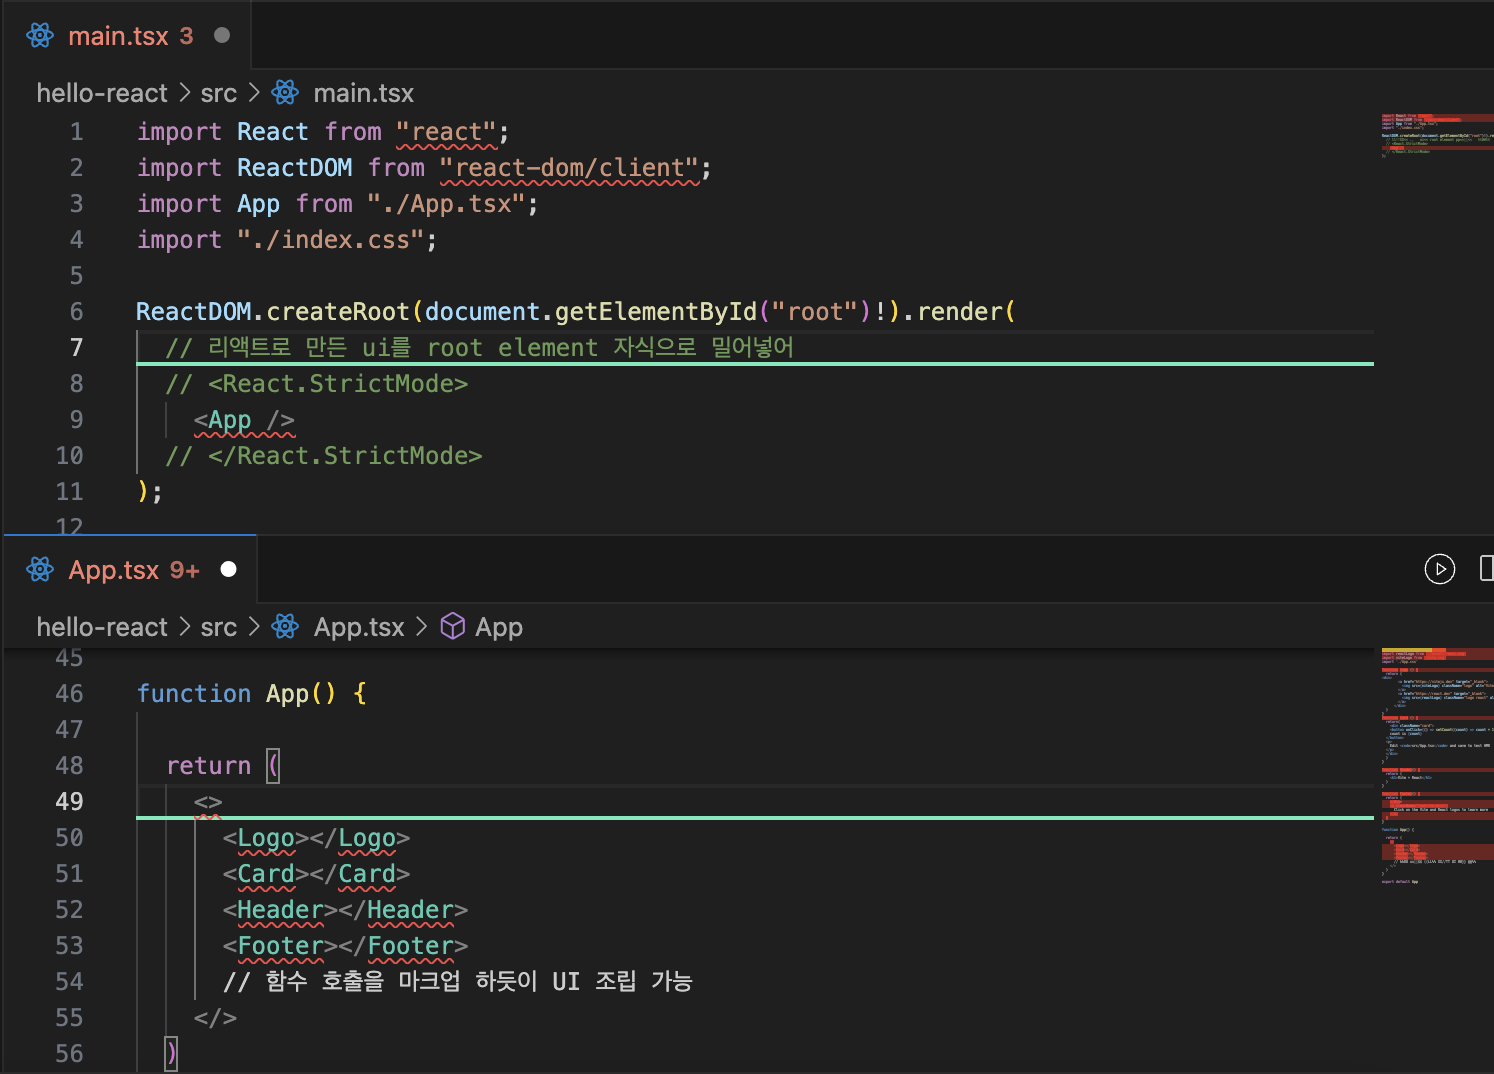
}
function Header(props: HeaderProps) {
return (
<h1>{props.title}</h1>
)
}
function App() {
return (
<>
<Logo></Logo>
<Card size="large"></Card>
<Header title="hello world"></Header>
<Footer message={x} color="black" bolder="yes"></Footer>
// 오류 발생, color에는 black이 들어갈 수 없음 !
</>
)
}vite: 간단해서 많이 사용
↓
webpack
create react app
babel을 이용해서 typescript --> javascript !
jsx tsx
x --> 리액트를 가지고 무언가를 한다 ! 생략 가능
기존 자바스크립트와 DOM을 이용한 방법
<div id="root">
  <article>
    <header>
      <h1>Title</h1>
    </header>
    <div class="container">
      <p></p>
      <nav>
        <button id="btn-update">Update</button>
      </nav>
    </div>
  </article>
<div>
↓
const btnUpdate = document.querrySelector('{id-btn-update}')
btnUpdate.addEvenListener('click', () => {
  const p = document.querrySelector('p')

  p.innerHTML = 'ha hah'
})
불편한 점
1. 코드들이 기본적으로 내가 무엇을 할지, html의 위치와 내가 조작할 요소들을 인지하고 있어야 함
2. 웹 앱의 경우에는 업데이트가 빈번함 (UI가 언제든 바뀔 수 있음 = html와 js가 강한 인연을 맺고 있음)
-- > html에서 id 바꾸면 js 작동 안함
'업데이트 되는 상황에서 self로 업데이트 되도록 만들면 어떨까 ?'
'html과 js가 독립적으로 !'
--> React 등장
html 태그 각각을 컴포넌트(Component)라고 명명하고 컴포넌트를 만드는 방법을 함수(Function) 또는 클래스(Class)로 정함
--> 번들링하는 과정에서 html처럼 생긴 모양으로 함수를 만들어주면 어떨까 ?
--> 번들링 하면 리액트가 알아서 바꿔주고 !
이미 알고 있는 html 태그 문법과 비슷하게 쓰면 돼 !
return {html 형식으로 !}
function App() {
  const [count, setCount] = useState(0)

  return (
    <>
      <div>
        <a href="https://vitejs.dev" target="_blank">
          <img src={viteLogo} className="logo" alt="Vite logo" />
        </a>
        <a href="https://react.dev" target="_blank">
          <img src={reactLogo} className="logo react" alt="React logo" />
        </a>
      </div>
      <h1>Vite + React</h1>
      <div className="card">
        <button onClick={() => setCount((count) => count + 1)}>
          count is {count}
        </button>
        <p>
          Edit <code>src/App.tsx</code> and save to test HMR
        </p>
      </div>
      <p className="read-the-docs">
        Click on the Vite and React logos to learn more
      </p>
    </>
  )
}
리액트 문법과 html 마크업 차이점
1. 리액트는 최상위에 1개 이상의 element가 오는 것을 허용하지 않음
return (
  <h1>hello react</h1>
  <p>안녕하세요 처음이시죠</p>
)
// 오류 발생
// 최상위에 1개 이상의 element가 오는 것을 허용하지 않음

return (
  <div>
    <h1>hello react</h1>
    <p>안녕하세요 처음이시죠</p>
  </div>
)
return (
  <>
    <h1>hello react</h1>
    <p>안녕하세요 처음이시죠</p>
  </>
  // 부모 역할만 하는 태그
)
2. 리액트는 태그가 모두 소문자 ! (대문자로 바꾸면 오류)
3. 함수 호출을 마크업 하듯이 UI 조립 가능, JSX 문법 사용
Function Logo () {
  return (
<div>
        <a href="https://vitejs.dev" target="_blank">
          <img src={viteLogo} className="logo" alt="Vite logo" />
        </a>
        <a href="https://react.dev" target="_blank">
          <img src={reactLogo} className="logo react" alt="React logo" />
        </a>
      </div>
  )
}

Function Card () {
  return(
    <div className="card">
    <button onClick={() => setCount((count) => count + 1)}>
    count is {count}
  </button>
  <p>
    Edit <code>src/App.tsx</code> and save to test HMR
  </p>
  </div>
  )
}

Function Header() {
  return (
    <h1>Vite + React</h1>
  )
}

Function Footer() {
  return (
    </div>
    <p className="read-the-docs">
      Click on the Vite and React logos to learn more
    </p>
  )
}

function App() {

  return (
    <>
      <Logo></Logo>
      <Card></Card>
      <Header></Header>
      <Footer></Footer>
    </>
    // JSX 문법
  )
}
4. 함수가 호출되는 순서대로 모양이 조립됨
cf. Babel
자바스크립트가 아닌 언어를 자바스크립트로 만들어줌
| 전 | 후 |
| function Header() { return ( <h1>hello</h1> ) } |
function Header() { return /*#__PURE__*/ React.createElement("h1", null, "hello"); } |
컴포넌트(Component)
어디서 가져다 쓰는지 상관하지 않음 (어디든 가져다 쓸 수 있음)
어디든 재활용, 재사용이 가능하게 만들어 놓은 무언가 !
UI를 담고 있는 작은 요소, 함수
종류
1. 함수 컴포넌트
2. 클래스 컴포넌트 (지금은 잘 안씀)
기능
1. 재사용성
2. props (사용하는 쪽에서 조작할 수 있게)
function Footer(props) {
  props.message;
  props.bolder;

  return (
  <>
    <p className="read-the-docs">
      {props.message}
    </p>
  </>
)
}

function App() {
  return (
    <>
      <Footer message="click on the Vite ~" bolder="yes"></Footer>
    </>
  )
}
속성이 몇 개이든 모두 다 하나의 객체로 만들어서 그 객체를 인자로 전달할거야 !
Typescript
자바스크립트는 변수를 만들 때 실제 데이터 유형(number, object, symbol, array 등 type !)을 지정하지 않음
타입 추론 가능
function App() {
  let x:string = "click on the Vite ~"
  let y:number = 100
  let a:boolean = true

// 타입 추론 가능

x = 10 // 에러 발생, string만 쓸 수 있어 !
타입 개념 확장
function App() {

  return (
    <>
      <Logo></Logo>
      <Card size="large"></Card>
      <Header></Header>
      <Footer message={x} color="red" bolder="yes"></Footer>
    </>
  )
}

// Footer는 인자로 props를 받음. message, color, bolder를 받음
// Footer가 받는 인자의 사양, 형태도 타입이라고 할 수 있지 않을까 ? (개념 확장)
// Card의 size도 props의 타입이지 않을까?

// 여러 개의 값을 명시할 때는 {}로 줄 수 있음
// 오류방지 뿐만 아니라 유형을 제공해주기 때문에 그 자체로 메뉴얼의 기능을 할 수 있음
// 문서를 읽는 시간을 줄일 수 있음

function Footer(props: {
  message: string,
  color: string
  })
  // 타입 정리 필수, 없으면 오류

  function Footer(props: {
  message?: string,
  color?: string
  })
  // 옵셔널, 넣어도 되고 안 넣어도 됨(빠져도 오류 안남)
밖으로 뺄 수 있는 방법 !
1. type
type FooterProps = {
  message: string
  color: string
}
2. interface
interface IFooterProps {
  message: string
  color: sting
}
'=' 유무 다름
동작은 같음
--> 언제 무엇을 쓸까 ? 팀이나 회사마다 표준 정책을 만들어 놓는 경우가 많음
더 확장해보자
1. 특정한 값 자체를 타입으로 지정 가능
type FooterProps = {
  message: string
  color?: 'blue' | 'red' | 'green' | 'yellow" // 또는
}

function App() {

  return (
    <>
      <Logo></Logo>
      <Card size="large"></Card>
      <Header></Header>
      <Footer message={x} color="black" bolder="yes"></Footer>
      // 오류 발생, color에는 black이 들어갈 수 없음 !
    </>
  )
}
--> 지정해둔 값만 들어갈 수 있음
2. 설계 먼저
흐름을 먼저 잡고 개발을 들어가는 좋은 방식
typescript
type HeaderProps = {
  title: string
  size?: 'small' | 'medium' | 'large'
  color?: 'blue' | 'red' | 'green' | 'yellow"
3. 중복 제거
type HeaderProps = {
  title: string
  size?: 'small' | 'medium' | 'large'
  color?: 'blue' | 'red' | 'green' | 'yellow"
}

type FooterProps = {
  message: string
  color?: 'blue' | 'red' | 'green' | 'yellow" // 또는
}
--> color 부분이 중복됨 ! 제거하는 것이 좋음
type Colors = 'blue' | 'red' | 'green' | 'yellow"

type HeaderProps = {
  title: string
  size?: 'small' | 'medium' | 'large'
  color?: Colors
}

type FooterProps = {
  message: string
  color?: Colors
}
--> Colors로 따로 빼서 그걸 사용하는 방식
타입스트립트의 유형 정의
type HeaderProps = {
  title: string
  size?: 'small' | 'medium' | 'large'
  color?: Colors
  icons?: string[]
  // 문자열만 들어가는 배열이라는 뜻
  icons?: [string, string]
  // 문자열인데 두 개만 받을거라는 뜻 (배열 개수 제한, 튜플)
  icons?: [string, number, boolean]
  // 다양하게 구성 가능
  icons?: [string, number, boolean][]
  // ['abc',10,true], ['abc',10,true], ['abc',10,true]
   icons?: [string, any]
  // any: 뭐든 들어와도 됨
}

